An exclusive pumping schedule for working parents usually means 8 to 12 pumps in 24 hours in the early weeks, settling to 6 to 8 once your supply is established, with 2 to 3 of those sessions inside an 8-hour workday. Planning it takes about an hour of honest scheduling and one test week.
Most of the trouble people run into isn’t pumping. It’s the fifteen minutes of setup, the five minutes of pouring and labeling, and the two minutes of rinsing parts that nobody puts in the calendar. A schedule that only reserves the pump time itself falls apart the first week a meeting runs long.
So the approach below builds the schedule around the workday you actually have, not the one you’d have on a good day. Treat it as a draft you test and adjust, not a standard you have to hit. This is general information, and an IBCLC or your own clinician can tell you where your personal numbers should sit.
Table of Contents
- What You Need Before You Draft a Schedule
- Step-by-Step: Building Your Exclusive Pumping Schedule
- Step 1: Map Your Workday and Fixed Obligations
- Step 2: Set the First Two Weeks on Paper
- Step 3: Match Each Session to a Realistic Pumping Block
- Step 4: Plan the Commute, Travel, and Backup Options
- Step 5: Organize Milk Labeling and Safe Storage
- Step 6: Review, Adjust, and Share the Schedule
- Common Mistakes in Working Parent Pumping Schedules
- Frequently Asked Questions
- How many times should a working parent pump exclusively?
- What is the best pumping schedule for an eight-hour workday?
- Can a parent use a manual pump at a backup location?
- How long should pumped milk be kept in a work refrigerator?
- What if pumping several times a day does not feel like enough milk?
- When should a pumping schedule be changed because of pain or low output?
- Start With One Week of Data
What You Need Before You Draft a Schedule
Get these in place first, because each one changes how many sessions you can realistically fit into a day.
- A pump you can run for 15 to 20 minutes per side. A double electric pump gets the job done in one pass. If your only option is a single, budget twice the time, and if it’s a wearable, build in extra minutes for setup and removal.
- The right flange size. Most pumping discomfort and most flat output trace back to a shield that doesn’t match. Change size gradually and ideally with guidance from a lactation consultant, because switching too fast can set supply back.
- Clean parts and a wash routine that works at 9 PM. If rinsing and drying takes 15 minutes on a work night, your block needs to be 15 minutes longer.
- Storage on both ends. Bottles or bags, a cooler bag with ice packs for the commute, and a marked spot in the work refrigerator. Bags and bottles need their own labeling tape or marker.
- A private space at work. Not a bathroom, ideally something lockable. In the US, the Fair Labor Standards Act gives pumping employees reasonable break time and a shielded place other than a bathroom; state rules can add more. Your manager may not know this, so say it plainly in writing.
- A timer you can hear across a room. A phone alarm labeled “PUMP” beats a mental estimate every time.
- An honest map of your day. Work hours, commute minutes both ways, fixed meetings, lunch, gym, childcare handoff. Include the days your partner works different hours, because those are the ones that break the plan.
Step-by-Step: Building Your Exclusive Pumping Schedule
Step 1: Map Your Workday and Fixed Obligations
Open a calendar and block out everything that can’t move: standups, recurring meetings, a commute that’s longer on Mondays, a nanny pickup at 5:15. Then look at what is genuinely flexible.
You are looking for the pockets that repeat most days. A 45-minute gap at 12:30 that exists every day is worth more than an hour that appears once a week.
Write down the childcare and feeding handoffs too. If a bottle is meant to be given at 2 PM, the pump session that feeds it needs to happen earlier, not later.
Step 2: Set the First Two Weeks on Paper
For the first two weeks, aim for 8 to 12 sessions in 24 hours, spaced as evenly as your day allows, with at least one overnight pump in the early weeks. Most parents find every 3 hours is a reasonable working rhythm, though individual needs vary widely and current clinical guidance plus your clinician’s advice should set the exact number.
Anchor to clock times rather than to “three hours after the last one.” A 7:30 pump that runs long doesn’t push the rest of the day backward if 10:30 is where you are supposed to be anyway. Several parents on forums describe this single change as the difference between a schedule that survives contact with a calendar and one that doesn’t.
Don’t build the whole week yet. Two weeks of real data tells you more than any template, because you’ll learn your actual output, your actual commute, and which breaks get eaten.
Step 3: Match Each Session to a Realistic Pumping Block
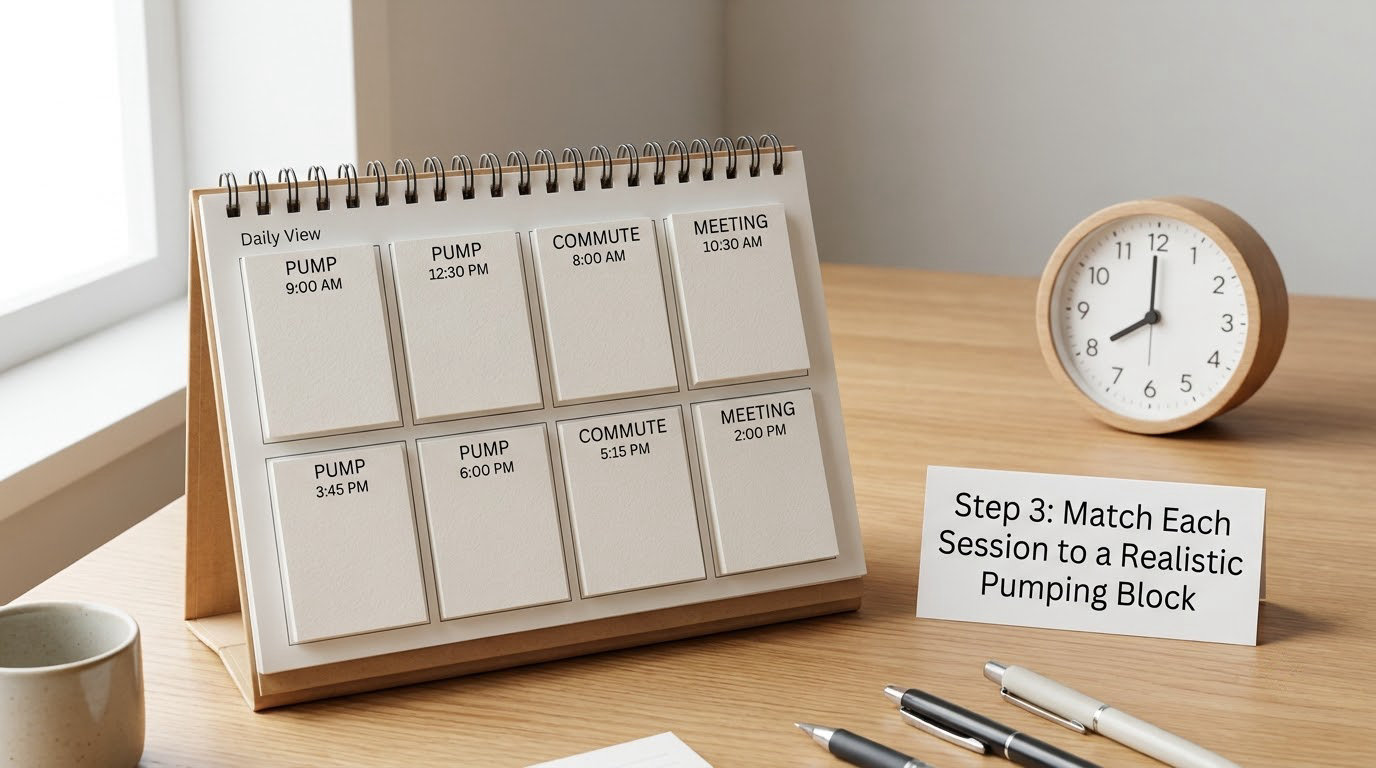
Plan a block, not a pump. A block covers setup, milk transfer, rinsing, and putting milk away, and it needs to be longer than you expect on your hardest day.
- A 20-minute block works when you have a double electric pump, a sink nearby, and parts that rinse in a minute.
- A 30-minute block is the realistic default for an office with a kitchen sink and a real walk to the room.
- A 45-minute block covers long commutes, cold parts storage, or a room you have to set up and take down yourself.
Two pumps of 30 minutes beat four of 20. Rushed sessions end early, and the sessions you consistently cut are the ones that cost you supply a week later.
Step 4: Plan the Commute, Travel, and Backup Options
Decide before you need it where you can pump if the day goes sideways. Options in rough order of preference: a second room at work, a car with a cooling setup, or a family member’s place near your route.
Know what travels well. A wearable or a small single pump with a battery pack fits in a bag and doesn’t need an outlet. A full double electric setup in a car is possible but awkward and warm, and you still need ice packs and a cooler.
If you miss a session, don’t rearrange the entire day around it. Resume your usual times, and use the next session for a longer pump to catch up if you can. Two missed sessions in a row is a reason to call a lactation consultant, not a reason to add a 5 AM pump that will wreck tomorrow.
Step 5: Organize Milk Labeling and Safe Storage
Label every container with the date and the time it was expressed. If someone else will give the bottle, add your name and the approximate amount. “Tue 7:30, 4 oz, from Mia” is a label that prevents a wasted bottle and a guessing game at pickup.
Transport follows current CDC and manufacturer guidance. Freshly expressed milk left at room temperature is used within about 4 hours, refrigerated milk within about 4 days at 40°F or colder, and frozen milk works best within about 6 months. Put milk in the refrigerator within 4 hours of expressing it, and use a cooler with ice packs for anything longer than that journey.
Rotate the freezer. Older bags move to the front, and anything past its own labeled date goes to the caregiver, not into the bin. When in doubt about a specific bag, the date on the container is what the guideline keys off.
Step 6: Review, Adjust, and Share the Schedule
After one week, review with your partner, your manager, your childcare provider, or a clinician, depending on what feels stuck. Look at three things: total output across the day, how your breasts felt during and after each session, and whether you could do it again tomorrow.
Change one variable at a time. Moving a session by 30 minutes is a normal adjustment. Cutting a session, changing flange size, and dropping the night pump in the same week is three experiments running at once, and if output dips you won’t know which one did it.
Track time, minutes, and amount per side. Daily total matters far more than any single session, because output is usually highest in the early morning and lowest in the evening. One bad session is noise. Three declining days is a pattern worth responding to.
Common Mistakes in Working Parent Pumping Schedules
Booking pump time but not the surrounding time. The fix is to book the whole block, then defend it. A 30-minute calendar entry with a note that it’s a pumping block stops people scheduling over you.
Changing flange size on your own, or keeping a size that hurts. Pain is a signal, not a rite of passage. If a session leaves you sore or bruised, stop and get fit advice before changing anything else.
Packing four sessions into one lunch break. You will cut them short, and the last one will be the one that gets skipped. Two full blocks beat four rushed ones.
Expecting identical output every day. Output moves with sleep, stress, illness, time of day, and how full you are. Judge the day by the day, not by the session that went badly at 4 PM.
Leaving milk handling unplanned. No cooler bag, no labeled spot in the fridge, no backup. A spoiled bottle is a lost session and a wasted day of work.
Skipping the conversation with your manager. Ask early, in writing, about break times, a space, and fridge access. Framing it as a predictable daily appointment tends to work better than framing it as a favor.
Running the schedule into the ground to prove a point. A sustainable schedule beats a perfect one. If the plan is costing you sleep every night, something in it has to move.
Frequently Asked Questions
How many times should a working parent pump exclusively?
Most parents pump 8 to 12 times in 24 hours during the first 12 weeks postpartum, then settle around 6 to 8 once supply is established. An 8-hour workday usually holds 2 to 3 of those sessions, with the rest placed in the early morning, evening, and overnight. Individual needs vary, so use your own output and comfort as the guide and ask a clinician about your specific number.
What is the best pumping schedule for an eight-hour workday?
A workable pattern is a pump before leaving, two mid-shift blocks of 30 minutes, and a pump shortly after you get home, plus an evening session and one overnight pump early on. Anchor to clock times such as 6:30, 10:00, 1:00, 5:30 and 9:00 so a late session does not push the rest of the day back. Two solid blocks are worth more than four rushed ones.
Can a parent use a manual pump at a backup location?
A manual pump works well as a backup for a single missed session or a short gap, since it needs no power and is quick to set up in a car or a family member’s home. It is slower than a double electric pump and hands-on, so it is a poor substitute for a full workday of sessions. Keep one in your bag, but do not rely on it as your only plan.
How long should pumped milk be kept in a work refrigerator?
Current CDC guidance is about 4 days for refrigerated breast milk kept at 40°F or colder, and about 4 hours at room temperature before it should be refrigerated. Use a cooler with ice packs for longer commutes and put milk in the work refrigerator within 4 hours of expressing it. Label every container with the date so an older bottle is used first.
What if pumping several times a day does not feel like enough milk?
Judge your total across the day rather than one session, since output is normally highest in the morning and lowest in the evening. Check flange fit, pump speed, and whether parts are assembled correctly before adding sessions. If totals keep dropping for several days, an IBCLC can look at fit, frequency, and timing with you. Persistent pain or fever needs a medical visit, not a schedule change.
When should a pumping schedule be changed because of pain or low output?
Change the schedule, or get help, when sessions regularly hurt, when you feel hard lumps that do not soften, or when your daily total falls for several days running. Pain, redness, fever, or flu-like symptoms should be assessed by a clinician promptly, since these can signal a blocked duct or mastitis. A sudden or large drop in supply is also worth a conversation with a lactation consultant rather than a quiet week of missed sessions.
Start With One Week of Data
If you do one thing this week, draft a seven-day schedule, add commute and cleanup buffers to every block, then run it as written for five days. A schedule tested while you are rested tells you far more than one designed in a good hour.
At the end of the week, look at your totals, how you felt, and whether you could repeat it. Adjust one thing. Most parents who last the year are not the ones with the perfect schedule; they’re the ones who kept looking at the data and fixed what was actually broken.
And keep the boundary clear: persistent pain, fever, redness, or a sudden drop in output is a reason to call a clinician or an IBCLC, not a reason to rework the calendar. Schedule problems get solved on paper. Medical problems get solved in an exam room.